Receive CASS Certification File
|
|
| Screen ID: | RCASSI-01 |
| Screen Title: | Receive CASS Certification File |
| Panel Number: | 1432 |
| Accessed by Tool Number: |
5243 |
NOTE: This screen is used in Step 6 and 7 of an eight step process. Refer to the CASS Certification Features booklet for Steps 1-5 and 8. Refer to this topic for Step 3: Creating the File. Refer to this topic for Step 4: Sending the File.
Introduction to Cass Certification
CASS Certification is the process where your member address information is compared with the U.S. Postal Service standard address listings and then corrected for proper formats and ZIP codes. If CU*Answers processes your statements, CASS Certification should be done on a quarterly basis. Before beginning the CASS Certification Process, be sure that CASS Certification Used is checked on the fourth Processing CU Parameter screen. Also refer to the CASS Certification Features booklet for more information on the CASS Certification Process.
Using this Screen - Step 6: Verifying All Changes Before Overwriting Files
This screen is used in both Step 6 and Step 7 of the CASS Certification Process. Click here to go to Step 7: Uploading Final Name and Address File to CU*BASE.
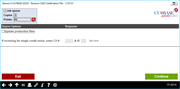
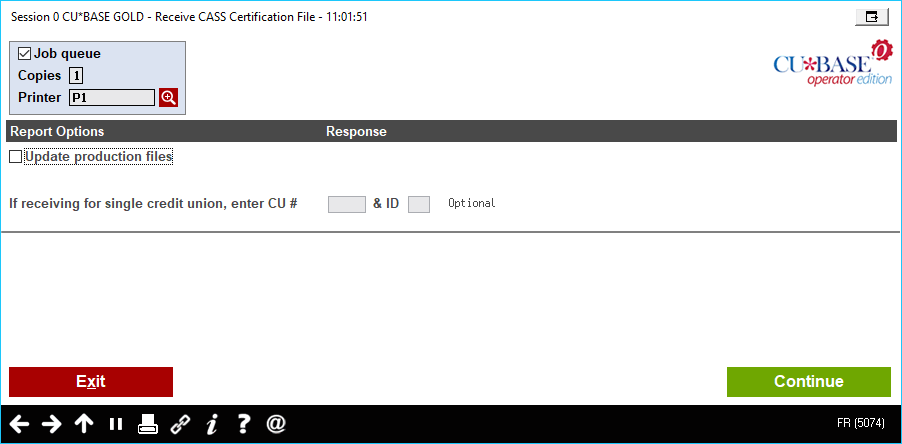
Caution: Once the file is received, it is the credit union’s responsibility to verify the actual names and addresses on the file before loading the file back to overwrite the live CU*BASE files. This step is crucial to ensure that the data is correct and that there were no problems with the file during certification. Verification is done by running an audit report. This is accomplished by using this option, without updating production files.
Leave the Update production field flag unchecked to ensure that live files are not affected by this process. Use Enter (or click Continue) to proceed. The system will automatically produce the audit report and send it to the printer specified on the screen.
Sample Audit Report
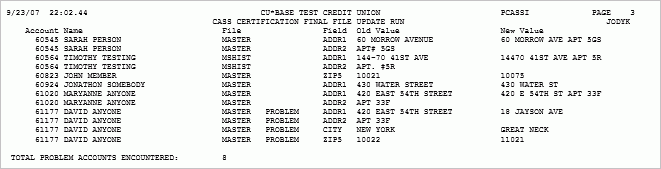
If any special problem accounts are marked here (marked as PROBLEM, as shown in the example above), DO NOT proceed to step 7. (See Special "Problem" Accounts below.)
The first time certification is performed, it is not uncommon for the report to show changes to nearly all of your addresses. However, subsequent certifications should produce far fewer items as most of the addresses will have already been corrected.
If you notice an unusually high number of addresses, it will be important to determine the cause. Do not proceed to Step 7. It may be necessary to repeat the entire process starting with Step 2 to ensure that live data files are not corrupted. Contact a CU*BASE Client Service Representative for assistance.
If the volume of changes looks about right, carefully examine the individual changes that have been made. Make a note of any that look incorrect (for example, if the state changes or the city and ZIP code has changed to a completely different area) or where the change might have a major impact on the mail being delivered correctly. Make a note of these individual items in order to perform manual corrections on the accounts once the file has been applied to production files (after Step 7).
DO NOT make the changes now, as they would be overwritten by the upload process in Step 7. For additional instructions, see “Handling Errors and Exceptions” in the CASS Certification Features booklet.
NOTE: As of 2010, the COUNTY has been added to the CASS Certification process. In cases the county cannot be verified, the system will not update what was manually entered in the County field in CU*BASE.
Special “Problem” Accounts
If any of the items in the list are marked “PROBLEM,” DO NOT proceed. Contact a CU*BASE Client Service Representative for assistance.
HINT: To scan for these accounts, while viewing the report in your output queue, enter the word “PROBLEM” in the Find field at the top of the screen and use F16. You may also move to the bottom of the report (enter “B” in the Control field) and note the total number of problems found.
These are records where the system cannot match the address in the Old Value column with the original master files currently on CU*BASE. This could indicate that an address was changed on the master CU*BASE files but the record was not flagged properly. Refer to the CASS Certification Features booklet for details. It could also mean that the account may not even be the same member as when the file was originally extracted, if the account was closed and reopened under a new name while the file was out for certification.
Any addresses marked “PROBLEM” will not be updated during the upload process (Step 7), and you will need to determine the reason for the problem and maintain the records manually after the upload.
REMEMBER: If major discrepancies are found, such as an abnormally high number of changes, the appearance of duplicate addresses on the report, or any accounts marked “PROBLEM,” DO NOT PROCEED TO STEP 7 or you risk the integrity of your member data. Contact a CU*BASE Client Service Representative for assistance.
Step 7: Uploading Final Name and Address File to CU*BASE
After all verification has been done for the address information on the returned file, this step will take the newly adjusted addresses and overwrite the data on your current CU*BASE files.
IMPORTANT: This step should NOT be done if any member files are being used by anyone else in the CU*BASE system. We recommend this process be completed after business hours when everyone has logged off the system.
WARNING!! WARNING!! WARNING!!
If this step is taken before the verification described in Step 6 has been completed, your live CU*BASE address files may become corrupted with bad data. CU*Answers does not warrant that your original data can be restored; therefore, it is extremely important that you are confident the data contained on the file is clean and correct and that any minor exceptions have been noted for later maintenance before proceeding.
On this screen, place a checkmark in the Update production field to update your live files.
Use Enter (or click Continue) to proceed. A report will be generated showing all of the actual changes made to member files. It is recommended that this report be printed and saved for future reference if any problems or questions arise on the results of the certification.