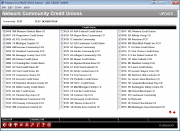
Adding Credit Unions to a Community

|
Click here to magnify |
| Screen ID: | UNETCTL-02 |
| Screen Title: | Network Community Credit Unions |
| Panel Number: | 3959 |
| Accessed by Tool Number: | 5399 |
Access this screen by selecting an existing Community on the main Network Communities screen and clicking Work with CUs.
This screen is used to select which credit unions belong to this Network Community. Listed will be all of the credit unions currently in the CU Master Profile File (CUMSTRPF) on this i5. (This file is maintained identically across the entire cuasterisk.com partnership, including self-processing credit union clients.)
Click to place a checkmark in front of any credit union who should be considered part of this Community.
-
NOTE: To speed things up, you could use Select All (F9), then remove the checkmarks for any credit unions not part of the Community. Or use Unselect All (F10) to remove all checkmarks and start fresh.
When ready, press Enter to save all choices and return to the previous screen. This will immediately grant login access to the selected credit union(s) for any user that is already part of the Community. (Remember that CU*BASE Employee Security still controls which tools and features this person can use.)
Notes About Security
-
The ability to add new Network Communities to the configuration is available only to data center employees that have been set up as Administrators in the Data Center Security database. (Refer to the Auditing Employee Access to CU*BASE Tools/Data Center Employee Security booklet.)
-
The ability to add or modify which users and credit unions are associated with an existing community is available to users who have been set up as Community Administrators on the Network Community Users screen.