Printing the Check Register
| Screen ID: |
LCKTBS-01 |

|
| Screen Title: |
Check Register Selection |
|
| Panel ID: |
5665 |
|
| Tool Number: | 636 | |
| Report Name: |
LCKTBX, LCKTB |
|
| Click here to magnify |
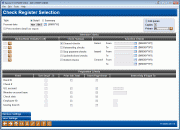
Access this screen by selecting Tool #636 Print Check Disbursement Register.
Helpful Resources
Visit Show Me the Steps for easy instructions on how to complete tasks related to monitoring the check register and performing other employee security tasks as well as statements/reports.
Screen Overview
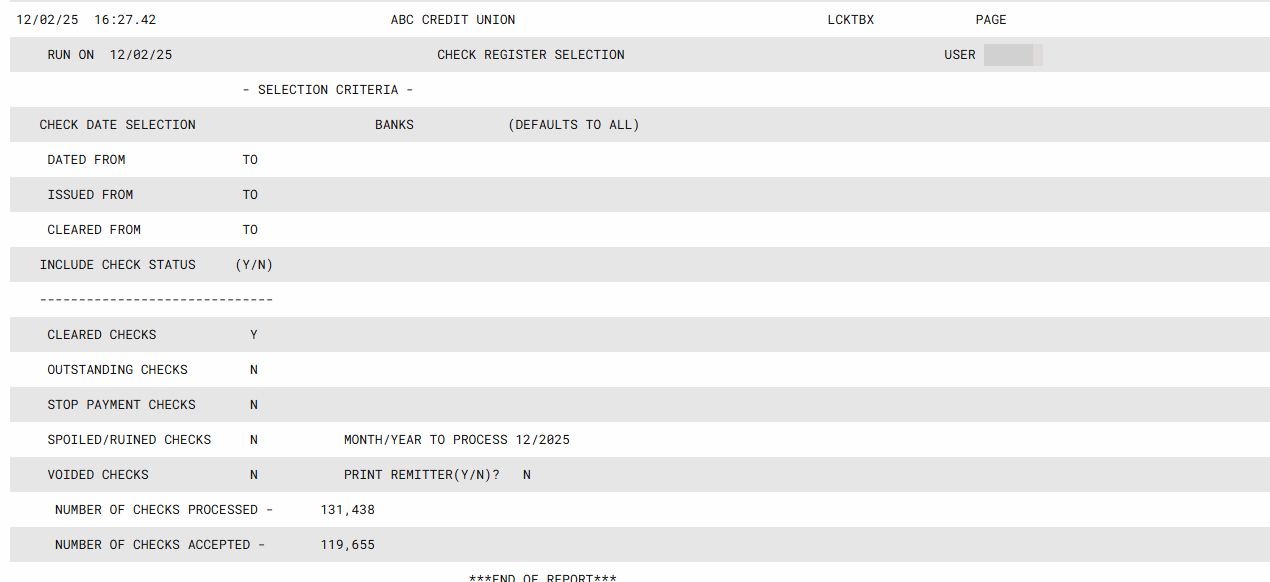
This screen is used to specify how the check register report is to print. The settings on this screen will print on a separate page along with the report for future reference.
-
The Selection Criteria area at the top of the screen contains fields that allow you to choose which checks will appear on the report.
-
The Preparation Criteria area at the bottom of the screen contains fields that let you specify sort sequence and subtotal options.
When all preferences have been specified, use Enter once to verify that all fields have been entered correctly, then use Enter again to print the report and return to the Home Page.
How Do I Save/Retrieve My Report Settings?
For more details on setting up this feature, refer to the Automating Reports and Queries booklet.
This report can be used with the Report Scheduler, a time-saving automation feature that allows you to select and save the filters you use to run several commonly used reports, and you can then set these reports to be run automatically by our operations staff on the first of the month or save the settings and run them manually by yourself at any time.
To save your report settings, first select your filters, including printer (can be a physical printer or the HOLDxx or MONTHxx OUTQs). Then select Save Settings . On the next screen, name your settings (we recommend adding your name!) and designate whether you wish to run this manually or if you wish for operations to run the report. At a later time, use Retrieve Settings to populate the screen with the settings you have saved. You can also edit your settings using Retrieve Settings. All saved settings can be viewed on the Report Automation: Standard Reports screen.
Field Descriptions
|
Field Name |
Description |
|
Top of the Screen This section contains fields that allow you to choose the month/year to process and to select some data that will appear on the report. |
|
|
Type |
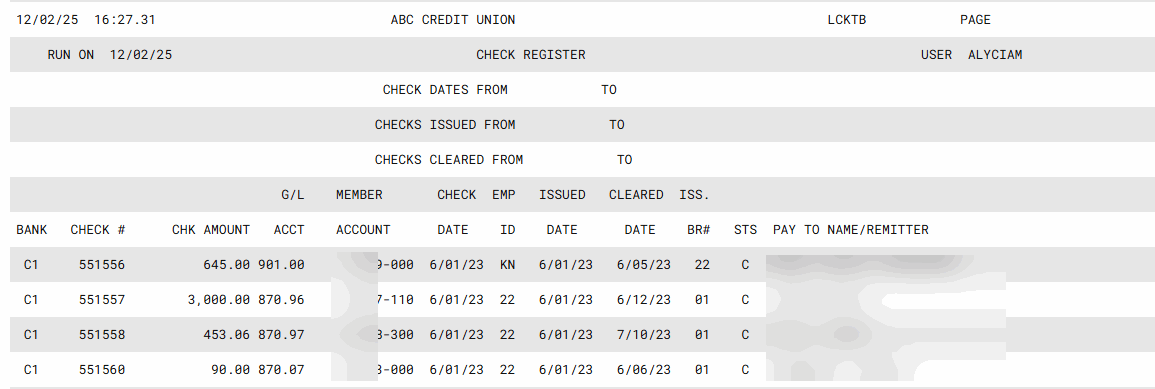
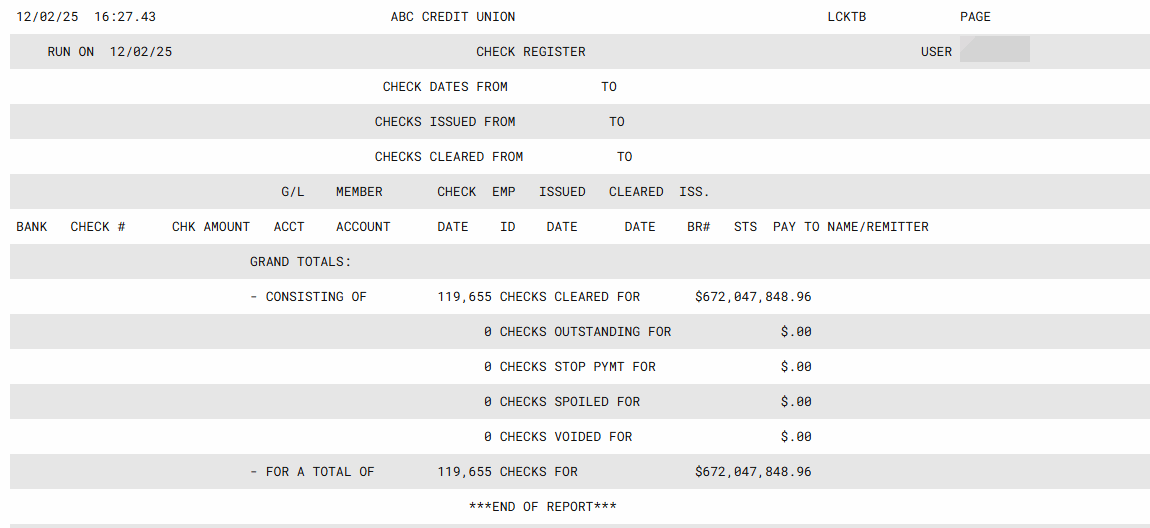
Select whether you want a Summary or Detail report. The Detail Report includes account information, while the Summary Report only includes totals. |
|
Month/Year to Process |
Enter the month and year for which data should be shown. Normally, three previous months are available. To run a report using month-end data prior to the months held online, contact a Client Services Representative. (There is a charge if this service is requested.) |
|
Print remitter detail on report |
Check this checkbox if you wish to see the remitter name from the check printed on this report. |
|
Selection Criteria This section contains fields that allow you to choose which checks will appear on the report. |
|
|
Banks |
To see checks for only a specific bank, enter up to five different bank codes here. Click the lookup button |
|
Statuses |
Check one or more of these checkboxes to specify which checks you wish to see on the report. |
|
Cleared checks |
Check this checkbox to include checks which have cleared. |
|
Outstanding checks |
Check this checkbox to include checks which are outstanding (have not been marked as cleared, void, spoiled, or stop pay). |
|
Stop Payment checks |
Check this checkbox to include checks which have been marked as having a stop payment order against them. |
|
Spoiled/Ruined checks |
Check this checkbox to include checks which were marked spoiled. |
|
Voided checks |
Check this checkbox to include checks which have been voided. |
|
Selection criteria |
Use these fields to specify the dates of the checks you wish to see on the report. |
|
Dated From / to |
To include checks based on the Check Date, enter a starting and ending date in these fields. This is the date that was printed on the check itself and used for the G/L entry. For an accounts payable check, this could be different from the Issue Date. Click here for details. |
|
Issued From / to |
To include checks based on the Issue Date, enter a starting and ending date in these fields. This is the date on which the check was actually printed. For an accounts payable check, this could be different from the Check Date. Click here for details. |
|
Cleared From / to |
To include checks based on the date they were marked as cleared, enter a starting and ending date. |
|
Preparation Criteria This section contains fields that let you specify sort sequence and subtotal options. |
|
|
Sort Seq |
In this column, enter a sequence of numbers, from 1 to 7, to specify the order in which the checks should be sorted. For example, to sort by date then check number, enter “1” next to Check Date and “2” next to Check Number. |
|
Print Sub-Total |
Place an “X” wherever you want to see subtotaled groups on the report. Before a new group of items begins, a check amount subtotal will be calculated. For example, to calculate a subtotal of all checks for a particular member account, place an “X” in this field next to the Member Acct Base field. The final result of the report will vary depending on the sort order and how many groups you have selected for subtotals. |
|
Insert Page Break |
Place an “X” in this column to indicate that each new group of items should begin on a separate page. For example, to print check information for each member on a separate page, place an “X” in this field next to the Member Acct Base field. The final result of the report will vary depending on the sort order and how many groups you have selected for subtotals and new pages. |
|
Select Only If Equal To: |
Use the fields in this column to enter a specific G/L, member account number, employee ID, or branch number. Only the item specified will print on the report. |
Report Samples
Following is a sample of the Check Register Selection report showing the settings used for the actual Check Register report:

Detail Report Sample

Summary Report Sample

 to see a list of your credit union's configured bank IDs. Leave all fields blank to see all banks.