Closed Member Account Report
| Screen ID: |
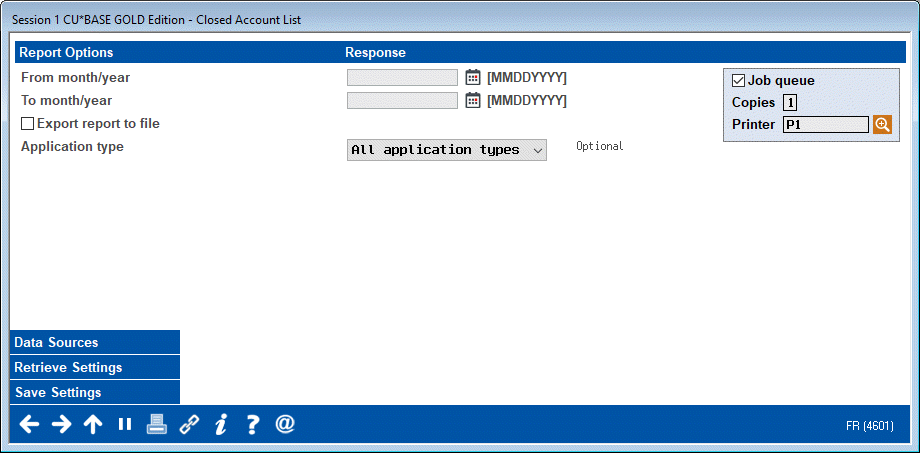
LCLAC-01 |
|
| Screen Title: |
Closed Account List |
|
| Panel ID: |
4601 |
|
| Tool Number: | 213 | |
| Report Name: |
LCLAC |
|
| Click here to magnify |
Access this screen by selecting Tool #213 Closed Account Report.
Helpful Resources
What are Open and Close Reason Codes, and where is this data stored in the core?
Analytics Booth: Power Line
Use Power Line to launch an immediate trend line graph in Analytics Booth to help you better understand your data.
Not a subscriber? Learn more in the CU*Answers Store.

|
Check out this video: Analytics Booth at a Glance |
Use this report:
-
To look at why certain accounts are closed by analyzing their account closing codes.
-
To review how many accounts are being closed.
-
To determine if certain accounts types should no longer be offered.
-
To review interest rates offered on accounts to ensure that they are competitive.
Practical Uses of this Report
Use this report to monitor closed member accounts. This report tells you at a glance which accounts have closed along with the date and amount of the final transaction. On the right, the Reason Code for the account closing is listed giving you immediate feedback into the reason for the account closing.
How do I create the report?
The Closed Member Account Report allows you to select the Month/year to process and allows you to select to show certain information including the account number/Name ID, member name, and member information. After selecting an Application Type, use Enter to view Select buttons allowing you to filter the report by other selectors, such as Loan Category, Dividend Application Type, and Loan Dealer.
Use Data Sources to view the files and fields used to generate the report.
How Do I Save/Retrieve My Report Settings?
For more details on setting up this feature, refer to the Automating Reports and Queries booklet.
This report can be used with the Report Scheduler, a time-saving automation feature that allows you to select and save the filters you use to run several commonly used reports, and you can then set these reports to be run automatically by our operations staff on the first of the month or save the settings and run them manually by yourself at any time.
To save your report settings, first select your filters, including printer (can be a physical printer or the HOLDxx or MONTHxx OUTQs). Then select Save Settings. On the next screen, name your settings (we recommend adding your name!) and designate whether you wish to run this manually or if you wish for operations to run the report. At a later time, use Retrieve Settings to populate the screen with the settings you have saved. You can also edit your settings using Retrieve Settings. All saved settings can be viewed on the Report Automation: Standard Reports screen.
Field Descriptions
|
Field Name |
Description |
|
From month/year |
Select the beginning of the date range to analyze. |
|
To month/year |
Select the end date of the date range to analyze. |
|
Application Type |
Select the dividend application to analyze. |
|
Export report to File |
Select this box to move to the Export selection screen where you can choose to export the information in this report for use with Member Connect or for Report Builder. |
Report Sample
