Create/Maintain Accounts Payable Invoices (1)
|
Screen ID: Screen Title: Panel Number: |
UAPINVC-01 Create/Maintain Accounts Payable Invoices UAPINVC-01 |
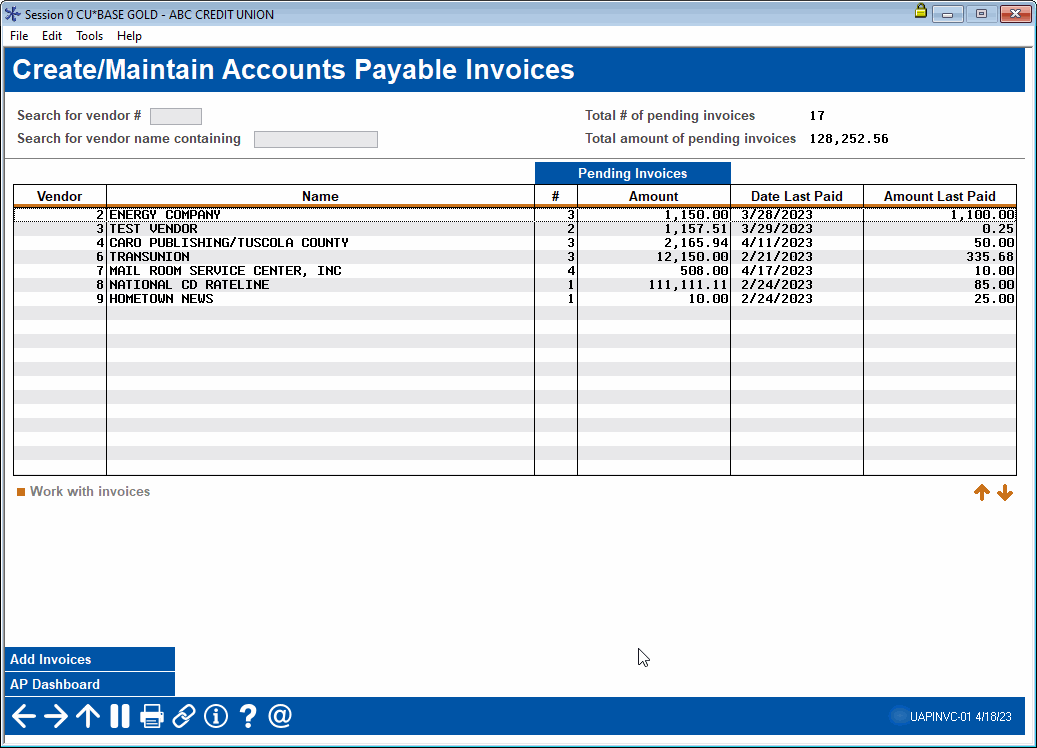
Access this screen by selecting Tool #998: AP1: Work With Accounts Payable Invoices.
This is the first of several screens used to enter invoice data into the Accounts Payable system. You may also edit or delete invoices using these screens.
Listed will be all open (unpaid) invoices already entered, along with any invoice templates you have created. At the top of the screen you’ll see the total number of pending invoices along with the net debit (payment) amount for all those invoices.
Click any column heading to sort the list by that column (click again for descending order). Or use the Search for... fields at the top of the screen to look for invoices already entered for a particular vendor.
• TIP: Use the AP Dashboard button to view a list of all accounts payable transactions for all your vendors.
Entering an Invoice
-
To create a new invoice (or template), use the Add Invoices button
-
On the window that appears, select one of your vendor names
-
Click Select and the main invoice maintenance screen will appear
-
Once all invoice details have been entered, use Save/Next Invoice to save and create another invoice for that same vendor, or Done/Next Vendor to create an invoice for another vendor, or Done/Exit to save and return all the way to the home page.
Modifying an Invoice
-
To view invoices already entered for a particular vendor, or to change details on an invoice already entered, select a vendor in the list and choose Work with invoices
-
A second screen will appear showing all invoices for that vendor
-
Select the invoice and choose Edit to proceed to the main invoice maintenance screen
About Invoice Templates
If you have vendors that you pay frequently, and the invoices have common debit items and G/L account numbers, you can create a template with placeholders for all of the typical entries, then copy that template any time you need to enter a new invoice you’ve received. Items can be rearranged so they are in the same order as the invoice you received, and you can use the template over and over again as needed.
-
To create a template, use the same steps described above for creating an invoice. When you get to the main invoice maintenance screen click to place a checkmark in the Template field near the top of the screen, then save as usual.
-
To use a template, first select a vendor in the list and choose Work with invoices, then select the template on the next screen and choose Copy to new invoice
-
A copy will be made and the main invoice maintenance screen will appear so you can adjust the details for that particular invoice (your template will not be altered)