Printing a G/L Monthly Trial Balance Report
| Screen ID: |
LGLETSC-01 |

|
| Screen Title: |
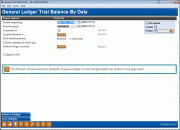
General Ledger Trial Balance by Date |
|
| Panel ID: | 5498 | |
| Tool Number: | 650 | |
| Report Name: | LGLETB | Click here to magnify |
Access this screen by selecting Tool #650 Print GL Trial Balance (monthly).
Helpful Resources
Screen Overview
The G/L Trial Balance by Date report lists activity for each G/L account in date order, with all branches included under each G/L account. Use this report to view all posted G/L activity by day.
This screen is used to specify exactly how the information should appear on the report. Some of the features of this particular report:
-
Print data for a single day/month or a range of days/months.
-
This report always includes data from complete months (unless you are reporting for the current month that has not been closed). If you wish to print only a portion of a month, print a G/L Daily History Report instead.
-
Print a detailed report listing each journal entry separately, or print just a summary report showing the total debit and/or credit activity for each G/L account.
-
Include a subtotal for each day of activity. This feature will work on the detail or the summary report.
-
Select one or a range of G/L accounts to be included on the report.
-
Note: The GL history is available for 2 years on CU*BASE so you should take this into consideration when you choose a start date to run this report. If you use an older date, CU*BASE will not have the daily history transactions to correctly display the running balance.
How Do I Save/Retrieve My Report Settings?
For more details on setting up this feature, refer to the Automating Reports and Queries booklet, available on the CU*BASE Reference page.
This report can be used with the “Report Scheduler,” a time-saving automation feature that allows you to select and save the filters you use to run several commonly used reports and then set these reports to be run automatically by our operations staff on the first of the month. Or you can save the settings and run them manually by yourself at any time.
To save your report settings, first select your filters, including printer (can be a physical printer or the HOLDxx or MONTHxx OUTQs). Then select Save Settings (F24). On the next screen name your settings (we recommend adding your name!), and designate whether you wish to run this manually or if you wish for operations to run the report. At a later time, use Retrieve Settings (F23) to populate the screen with the settings you have saved. You can also edit your settings using Retrieve Settings (F23). All saved settings can be viewed on the Report Automation: Standard Reports screen.
Field Descriptions
|
Field Name |
Description |
|
Period Beginning (MMDDYYYY) |
Enter the beginning date for which data should be shown.
|
|
Period Ending (MMDDYYYY) |
Enter the ending date for which data should be shown.
|
|
Corp ID |
The corporation number for which the report should be run. |
|
Location No |
(Optional) Enter a location number to include accounts for that location only. |
|
Print Detail / Summary |
Use “D” to print each individual journal entry. Use “S” to summarize each G/L account, showing the net total debit and/or credit for each account. |
|
Print Subtotals For Each Day |
Choose Yes to print a subtotal after all transactions for each day. Choose No if you do not wish to print any subtotals. |
|
General ledger account |
(Optional) Use the Select button to define a range of G/L accounts to be printed, or to select individual G/Ls. |
|
Export to file |
Checking this box will allow you to export this information to a file for use with Report Builder. If you select this option, an additional screen will appear, allowing you to enter a filename |
Report Samples
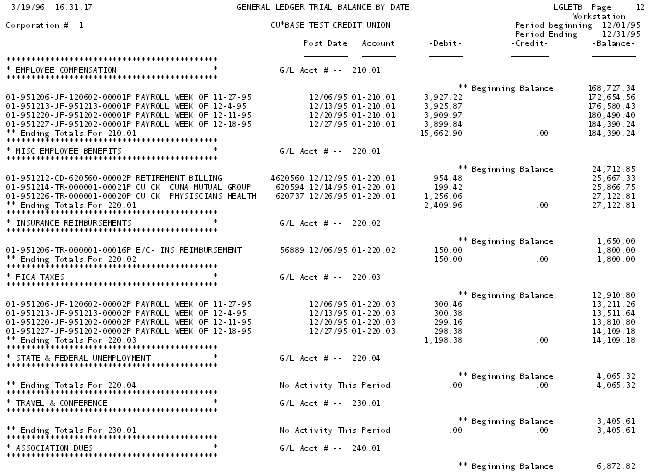
The following sample was printed using “D” for detail and “N” for no subtotals by day. (Only one page of the report is shown.) Notice that detail is given for each G/L account, with a beginning and ending debit and credit balance.

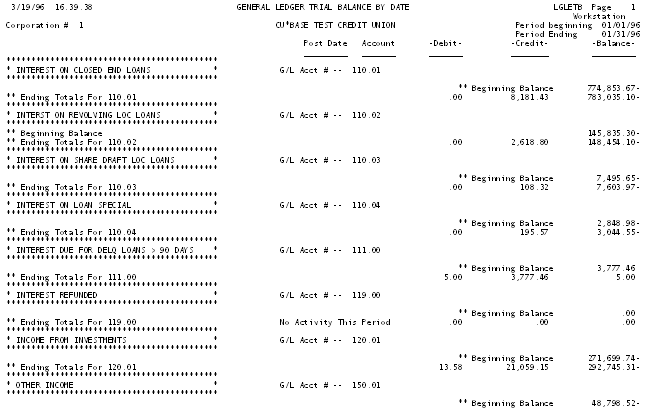
The following sample was printed using “S” for a summary and “N” for no subtotals by day. (Only one page of the report is shown.) Notice that no detail is given, but each G/L account shows a beginning and ending debit and credit balance.
