Configuring an Approval Matrix (OTB/User-Defined Products)
|
Screen ID: Screen Title: Panel Number: |
UAPVMXT-04 Configure Approval Matrix 6375 |
|
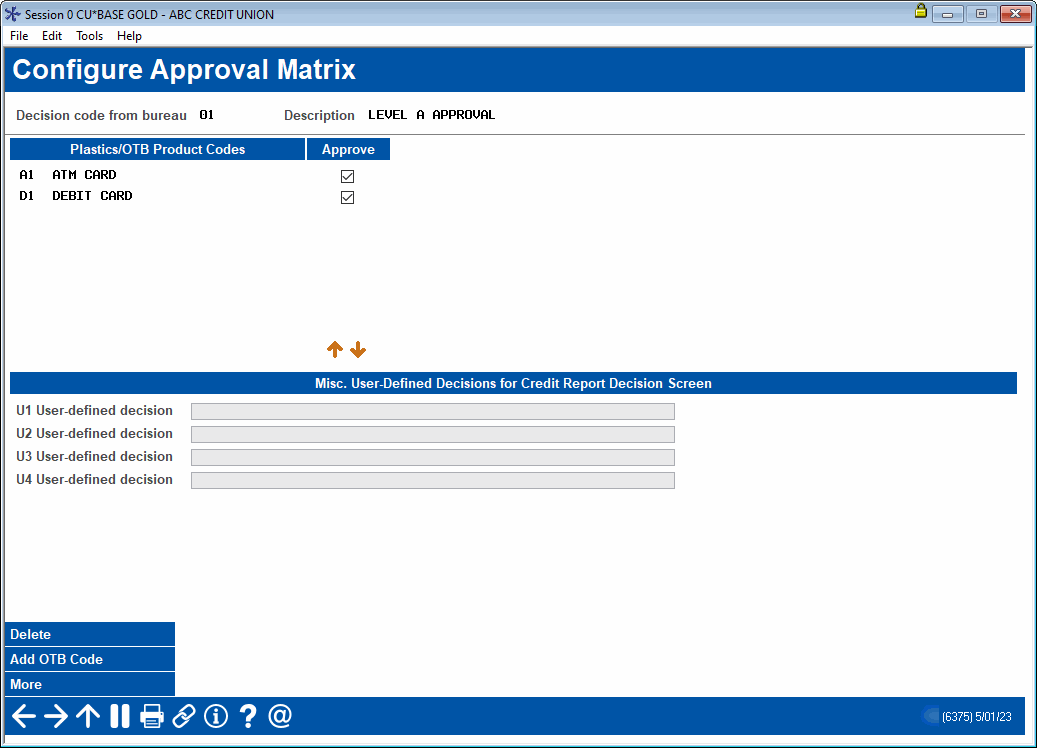
Access this screen from the third approval matrix screen.
For details, refer to the booklet, Online Credit Bureau Access and FUEL: Configuring FUEL and the Approval Matrix.
This final screen is used to mark OTB/Plastic products that should be approved with this Decision Code. This includes OTB credit cards as well as OTB loan and savings products you may offer and track through the CBX Off Trial Balance (OTB) tracking system. These use a straight Yes/No approval; there are no dollar amounts.
Use Add OTB Code (F6) to display a window showing all configured OTB codes. Select all appropriate codes. When returned to this screen, all will automatically be marked as Yes (use Delete to clear an unneeded item from the list).
This screen also contains four user-defined decisions for this code. These are simply text messages that will appear on the Decision screen whenever this code is sent with a member’s credit report. These can be an approval for a specialized credit union product or service not shown on the previous screens, or even just a text message to credit union staff for when they read the Decision screen for any member that received this code. Examples of text you might use in these fields:
“Assign member to Electronic Deposit Hold Group 02”
“Review credit report manually before approving any product”
“Refer to investment advisor”
“Deny all products for this member”
For codes 97-99, which are used when either the filters or the model fails, create the code as usual. Leave the loan and share product screens blank, and enter “N” for both ATM and Debit cards on the final screen. Then use one (or more) of the User-Defined fields to leave a notation explaining the code to the end-user (such as “Deny all products” or “Manually review credit report before approval” or something similar). If this code is received on a member’s credit report, the Decision screen will simply show the text in your user-defined field, without any products.
Notice the Retained notation showing how long the decision record will remain on file before it is purged. You can set the Active setting to the same period as this, or shorter. You might use a shorter time for decision codes that you feel less comfortable about and want to restrict the length of time the record can be viewed by non-loan personnel or used for automated approvals.
-
NOTE: Contact a Client Service Rep. if you wish to increase the length of time credit report data is stored. Additional fees will apply for longer than standard retention times. Credit report decisions are retained for 24 months.
When done, use Enter to save and return to the initial screen.