Configuring Laser Certificate Forms
|
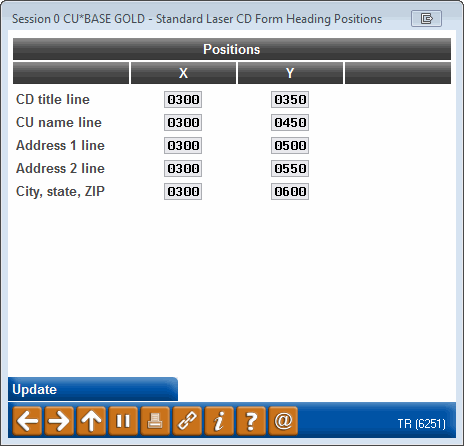
Screen ID: Screen Title: Panel Number: |
UCDCFG-03 Certificate Form Configuration 6251 |
|
NOTE: This is an older-style form with limited configuration options. For more flexibility in creating certificate forms, use Misc. Member Account forms (Tool #261).
Access this screen by selecting Adjust Headings on the CD form maintenance screen.
These screens are used to create customized forms to be printed whenever a certificate account is created. Designed for laser printing only, these forms provide a professional, high quality look to your certificate forms, and allow your credit union to customize and modify the form text at any time.
-
For complete information on using these screens to create and maintain your CD forms, refer to the User-Defined Laser Certificate Forms booklet.
This screen is used to make minor adjustments to the placement of the CD Title, credit union name, and credit union address information at the top of the printed form.
The “X” position represents the left edge of each line of text, and the “Y” position represents the top edge of each line, relative to the edge of the paper. To adjust the headings to a different position, try entering a different number in the “X” or “Y” position. This is at best a trial and error process, so don’t be afraid to experiment!
-
Examples for this are shown in the User-Defined Laser Certificate Forms booklet.
When done, use Enter to record all changes and return to the previous screen. You will see a notation, “Record has been updated” referring to the heading changes. Be sure to also use Update once you return to the previous maintenance screen so that any changes made to the free-form text are also saved.