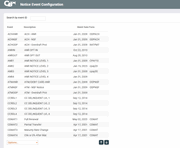
Configuring Laser Notices (Notice Event Configuration)
|
Screen ID: Screen Title: Panel Number: |
UNPURP-01 Notice Event Configuration 5530 |
Access this screen when you use Define Event Details on the initial form configuration screen.
-
For complete information about configuring and printing laser member notices, refer to the Member Notices: Configuring and Printing CU-Defined Laser Notices booklet.
-
For directions on specifically configuring Opt In and/or Opt Out notices, refer to Opt In/Opt Out (Reg E) – Managing Your Offering.
This is the first of several screens used to change the account details that are printed with each Event ID, and to control the text associated with the events. When a form is configured, you can choose to include as many of these events as you wish.
Event IDs have already been set up for you and include all of the various system activities and member transactions that generate a member notice. For example, daily loan delinquency monitoring generates notice information when a loan goes delinquent, and daily CD monitoring automatically generates various notice events as different types of certificates mature.
-
New events will be added as new CU*BASE processes are developed over time; contact a CSR if you have ideas for other system activity that should generate a notice to members. Programming is required in order to feed the notice file with transaction and account information so that a form can be printed.
To work with the text and account details associated with an event, select the event and use Change to proceed to the second screen.
