Configuring Laser Notices
| Screen ID: | UNOTIC-01 | 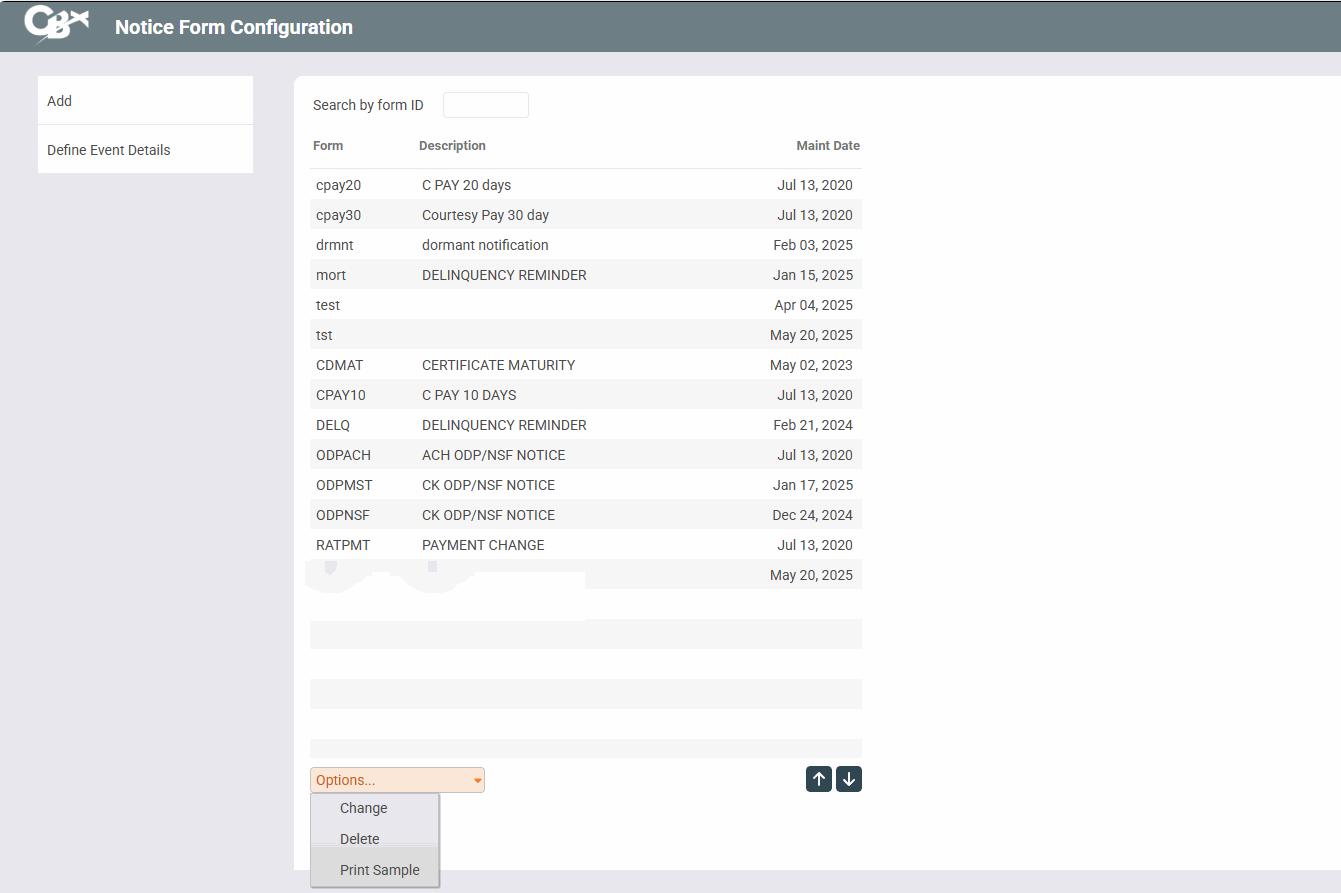
|
| Screen Title: | Notice Form Configuration | |
| Panel ID: | 5523 | |
| Tool Number: | 258 | |
| Click here to magnify |
Access this screen by selectingTool #258: Configure Laser Notices.

|
Check out the video related to this topic: Configuring Delinquency Notice Layout (More videos below!) |
Helpful Resources
Visit Show Me the Steps for easy instructions on how to update delinquency notices.
For complete information about configuring and printing laser member notices, refer to the Member Notices: Configuring and Printing CU-Defined Laser Notices booklet.
For directions on specifically configuring Opt In and/or Opt Out notices, refer to Opt In/Opt Out (Reg E) – Managing Your Offering.
Screen Overview
This is the main notice configuration screen, the first of three used to design the layout and contents of printed Member Notice forms. From this initial screen you can create, edit or delete a form, as well as set up the text and account detail information that will appear for each notice event included on the form.
-
To edit an existing form, select the form and use Change.
-
To change the account details that are printed with each Event ID, or to modify the text associated with the events, use Define Event Details.
-
To create a new notice form, use Add.
-
To delete an existing form, select the form and use Delete. One confirmation message will appear; use Enter again to delete the entire form. All events that have been associated with that form will now be available to be connected to another form. (Use Define Event Details to view a list of event codes with associated forms.)
Additional Video Resources
|
|
Check out these additional video resources! |