Configuring Tiered Service Levels
| Screen ID: |
UTSERV-02 |
|
| Screen Title: |
Configure Tiered Service Levels |
|
| Panel ID: |
2971 |
|
| Tool Number: | 853 or 437 | |
| Click here to magnify |
Access these screens by selecting "Configure Tiered Service Level Descriptions and Point Range" on the entry Tiered Services Configuration screen.
-
Refer to the Tiered Service Levels Implementation Guide for details setting up a program and important tips on setting up an effective Tiered Services program for your credit union.
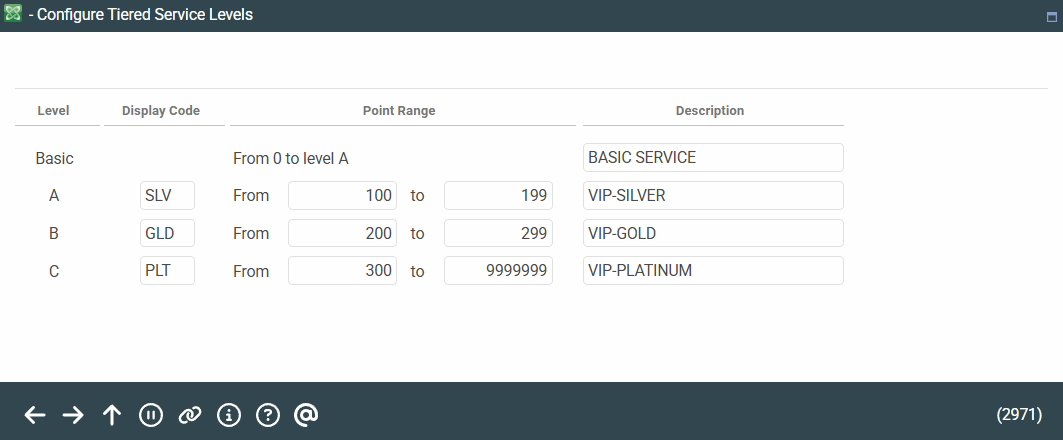
This screen is used to name the three Tiered Service Levels used by your credit union and assign the point score range used by each level.
IMPORTANT: If you have already implemented member rewards and want to change the point ranges, DO NOT use this screen! Changes made here will immediately affect any fee waivers and other rewards that you have set up. Instead, return to the previous screen and use Schedule Point Range Changes instead to schedule the change to occur as of a specified month. You can, however, use this screen to make changes if you have not yet implemented any member rewards.
The names assigned here should correspond to those that are used when marketing the program to your members. The description entered on this screen will appear on Member Inquiry, Phone Inquiry, and Teller Posting screens to enable member service personnel to discuss with members what their current status is and encourage them to take advantage of the services that will promote them to a higher level.
In order for monthly scoring reports to calculate properly, Level A must be the lowest level, with Levels B and C progressively higher. Be careful not to overlap the point ranges; the “From” amount on one level should be higher than the “To” amount on the previous level. The Display Code is a three-character (alpha or numeric) abbreviation used to identify the level.
If your Level A does not start at zero, then the “Basic” level will be used for any members that score lower than your Level A starting point. You can change the label from “Basic Service” to anything you wish, in essence creating a fourth level. However, remember that the basic level cannot be granted the same special rewards as Levels A, B, & C.
When done assigning levels, use Enter to record the change and return to the previous screen.