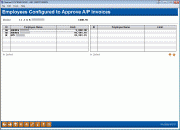
Approve Accounts Payable Invoice
|
Screen ID: Screen Title: Panel Number: |
PAPAPR1-01 Employees Configured to Approve A/P Invoice 6502
|
|
Access this screen by selecting Tool #1920: Approve Accounts Payable Invoices.
This tool is available if approvals of invoices is activated. Overview: Accounts Payable Approvals
About this Screen
This screen is used to approve invoices that are assigned to you employee ID. Learn more about invoice approvals. All invoices that are ready to be approved by your employee ID will appear on this screen.
How are Invoices Assigned?
Invoices are assigned to you if you are a default approver of a vendor (configured in the Vendor Configuration) or if you have been assigned to approve an invoice in the Organize Invoices for Approval/Payment screen. Your profile to approve invoices is configured in the Accounts Payable Workflow Controls screen. You may also receive email notifications alerting you that an invoice is assigned to you. Learn more about invoice approvals notifications. (As long as the invoice is not yet approved, you can assign a different approver to it using this screen.)
Using this Screen
Use the buttons and options (described below) to review the details of the invoice. (All columns with a colored header are sortable.) Then select the item(s) you wish to approve by checking the first column. The Total Amount Approved for Payment and Total Items Approved for Payment will update as you use Enter. When you have completed your approvals, use the "Done" button to exit the screen. All checked (approved) invoices will then appear on the Organize Invoices for Approval/Payment screen so that they can then be prepared for payment. (The Approver ID (Employee ID) and Approval Date are then populated in the APOPEN table.)
If you do not wish to approve any invoices at this time, use the Unmark All Items button to deselect any items that have been checked and use the "Done" button to exit the screen. You can also use the up arrow to exit the screen
 Integration between
CU*BASE and your imaging solution
This screen has smart links to and from your Imaging Vault!
-
Select an item on the list and
 and ProDOC will appear with the vendor number and
invoice number pre-populated.
 -
Select an invoice and then
 to view archived items with the vendor number and invoice
number. If archived documents with both indexes are not
found you will view archived items with either the vendor number
or invoice number.
 -
Indexing invoice documents is warranted for most credit unions; however it does require activation and configuration. Contact Imaging Solutions for more details.
Remember: Only documents warranted by the CU*Spy can be scanned into that vault. Clients with in-house imaging solutions should contact Imaging Solutions for assistance configuring links for use with your vault.
Buttons
|
Buttons |
Description |
|
Done (F5) |
Use this to exit the screen. All selected invoices will be returned to the Organize Invoices for Payment an Approval screen to be prepared for payment. |
|
Up arrow (F7) |
If you do not wish to approve any invoices at this time, use the up arrow to exit the screen. |
|
Mark All Approved (F9) |
Use this to select all items on the list for approval. |
|
Unmark All Items (F10) |
Use this to deselect all items that are selected for approval. |
|
Invoice Desc/Invoice # (F11) |
Use this to toggle the column on the list to show either the vendor description or the invoice number. |
|
Vendor #/Payee (F12) |
Use this to toggle the column on the list to show either the vendor number or the payee. |
