Member Service Denial Notices
| Screen ID: | CDNPRO-01 | 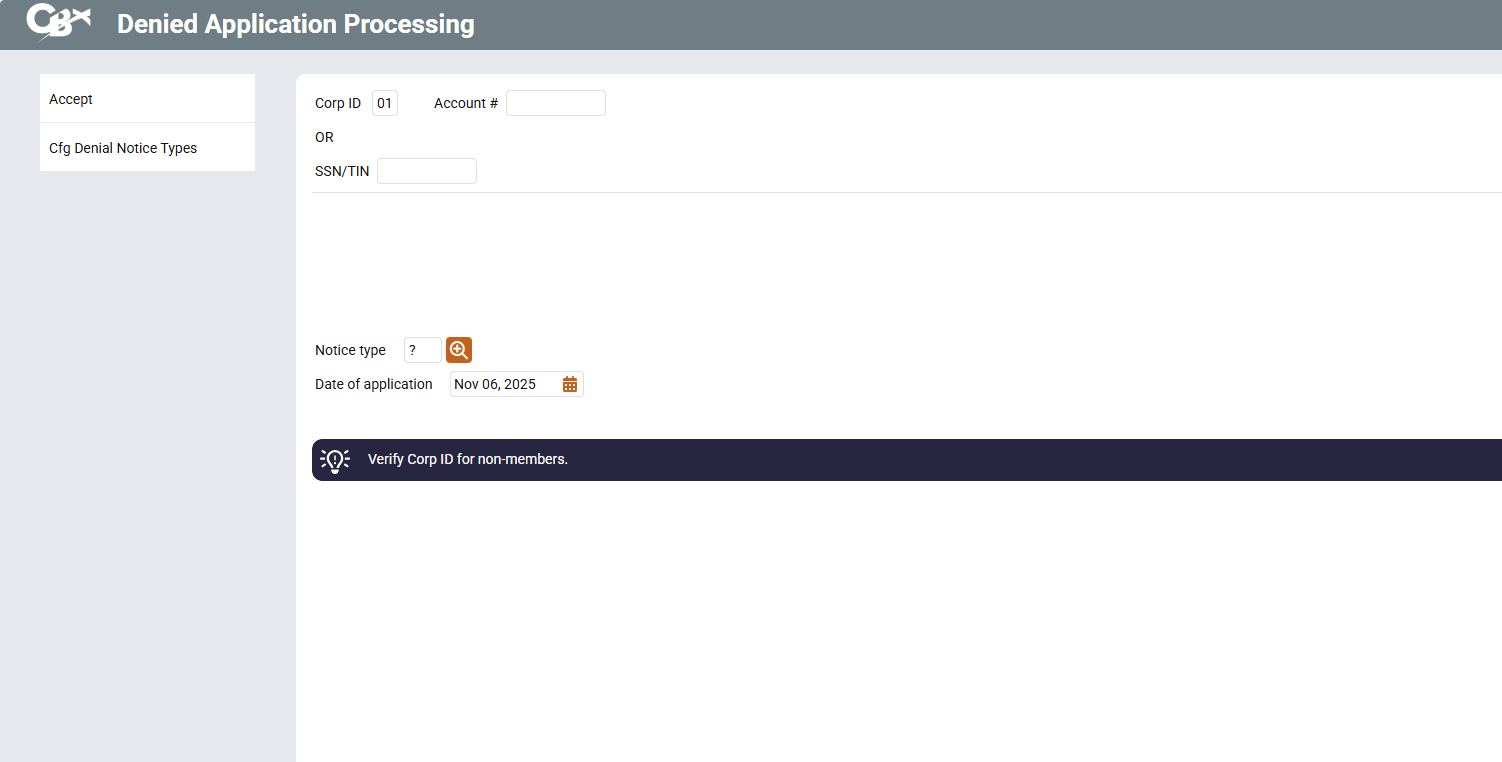
|
| Screen Title: | Denied Application Processing | |
| Panel ID: | 13 | |
| Tool Number: | 3 | |
| Click here to magnify |
This screen appears when you use Denied Services on the initial Membership Services screen, or when you click Deny Membership on the Verify Membership Creation screen.
Screen Overview
This is the first of several screens used to generate and track laser-printed denial notices for applications other than loan applications handled through the Lending software.
Notice types are credit union-configured, and can include notices for denied checking accounts, ATM cards, Debit cards, applications for membership, or other related member services. Any notice generated is added to a report which can be produced each month to show any applications denied during the month.
-
For information on the reporting capabilities of this feature and a sample of a printed form, see the separate Miscellaneous/Member Service Denial Notices booklet.
-
CU*TIP: When using these screens to deny a new membership (must click the Deny Membership button on the create membership confirmation screen), the core will automatically create a non-member record. If the denial notice is actually printed, the Deny membership flag will be checked on that new non-member record. The Denial type code used here will be recorded (showing the reason for the denial), as well as the date.
First enter the Corporate ID to control which CU name appears on the
printed form. Enter the account base (for a member) or Social Security
number (for a non-member), then enter one of your credit union's configured
Denial Notice Type codes (click the lookup button  to see a list of your credit union's configured codes). Also enter the
date on which the original application was made (mmddyy).
to see a list of your credit union's configured codes). Also enter the
date on which the original application was made (mmddyy).
Before proceeding, use Enter to verify all entries. If an account base was entered, the system will display the member's name and the description of the notice type selected. If a new non-member was entered, a non-member information screen will appear first to allow you to record a name, address, and other basic information into your master non-member database.
If the information shown is correct, use Accept to proceed to the next screen.
-
To configure the Denial Notice Type Codes, use Cfg Denial Notice Types.
Additional Video Resources

|
Check out these additional video resources! |
View more membership application-processing videos.