Loan Interest Analysis Report
|
Screen ID: Screen Title: Panel Number: Report Name: |
LLNIA1-01 Loan Interest Analysis 4608 LLNIA |
|
Access this screen by selecting Tool #466: Loan Interest Analysis Report.
Helpful Resources
NOTE: This report can be generated using different sort via the Loan Information Report screen. The selection screen for this report is on this screen.
Use this report:
-
As an Asset Liability Management tool
-
To review/verify total portfolio for any exceptions
-
To evaluate interest rate direction of the total loan portfolio +/-
-
Break out Participation Lending loans from the rest of the loan portfolio
Practical uses of this report
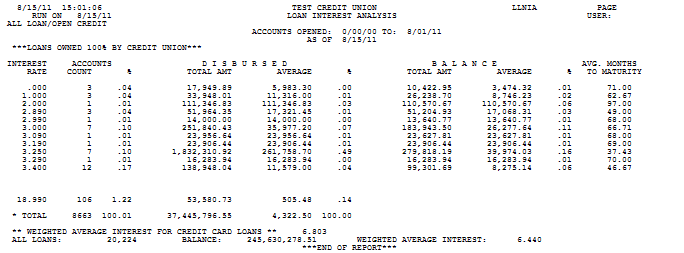
Use this report to see your current portfolio yield. Track this information to look back and see where your loan spread has been historically and which direction it is moving. Use this analysis to move your portfolio in the direction you want to go in the future!
How do I create the report?
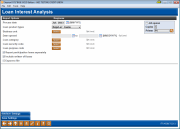
This selection options allows you to produce a report showing open loan statistics. The report pulls loans for one month at a time and defaults to the current month. Optional fields limit the report to include only accounts opened on a certain month and/or only by specific loan types, including regular loans, open credit and student loans.
If a month that the loan was opened is entered in the “Enter the date the account was opened” field or a specific loan type is selected, an analysis is listed at the end of the report. This analysis summarizes the weighted average interest rate for the loan portfolio.
You can select to break out your participation loans by checking the “Report participation loans separately” check box.
How Do I Save/Retrieve My Report Settings?
For more details on setting up this feature, refer to the Automating Reports and Queries booklet, available on the CU*BASE Reference page.
This report can be used with the “Report Scheduler,” a time-saving automation feature that allows you to select and save the filters you use to run several commonly used reports and then set these reports to be run automatically by our operations staff on the first of the month. Or you can save the settings and run them manually by yourself at any time.
To save your report settings, first select your filters, including printer (can be a physical printer or the HOLDxx or MONTHxx OUTQs). Then select Save Settings (F24). On the next screen name your settings (we recommend adding your name!), and designate whether you wish to run this manually or if you wish for operations to run the report. At a later time, use Retrieve Settings (F23) to populate the screen with the settings you have saved. You can also edit your settings using Retrieve Settings (F23). All saved settings can be viewed on the Report Automation: Standard Reports screen.
Field Descriptions
|
Field Name |
Description |
|
Date desired |
This is the month whose month end data is used to calculate the statistics. |
|
Loan Product Types |
Select from All Loans (Blank), Regular Loans, Open Credit, or Student Loans. |
|
Business Unit |
(Optional) Use the Select button to reveal a screen; use Ctrl + Select to select one or more business units to filter by, then use Select to return to the original screen. The number of business units selected will appear next to the button. |
|
Date the account was opened |
This date helps you narrow your findings to loans opened on a single date. |
|
Category desired |
(Optional) To include only accounts with a specific loan category code on the report, use the Select button to reveal a screen to select one or more loan security codes. SEE ALSO: Filter and selection directions. When you return to the screen, the count of the items selected with appear next to the button. |
|
Security code desired |
(Optional) To include only accounts with a specific security code on the report, use the Select button to reveal a screen to select one or more loan security codes. SEE ALSO: Filter and selection directions. When you return to the screen, the count of the items selected with appear next to the button. |
|
Purpose code desired |
(Optional) To include only accounts with a specific purpose code on the report, use the Select button to reveal a screen to select one or more loan security codes. SEE ALSO: Filter and selection directions. When you return to the screen, the count of the items selected with appear next to the button. |
|
Report participation loans separately |
If this box is checked, the report will separate out the participation loans in a separate section of the report. |
|
Include written off loans |
Check this box to include written-off loans in the results. Leave this unchecked if you wish to exclude written-off loans in the results. |
|
Export to file |
Use “Export report to file” go to the screen where you can choose to create a file to use with Report Builder. |
Report Sample

