Working With AP Vendor Information
|
Screen ID: Screen Title: Panel Number: |
UAPVE-01 Accounts Payable Vendors 1654 |
|
Access this screen by selecting Tool #990: Work with Accounts Payable Vendors (Shortcut: achdist) (maintenance) and Tool #106: Accounts Payable Vendor Inquiry (inquiry). When approvals are not activated this screen is also access by selecting "Create Quick Check" on the Process Payments for Vendors screen.
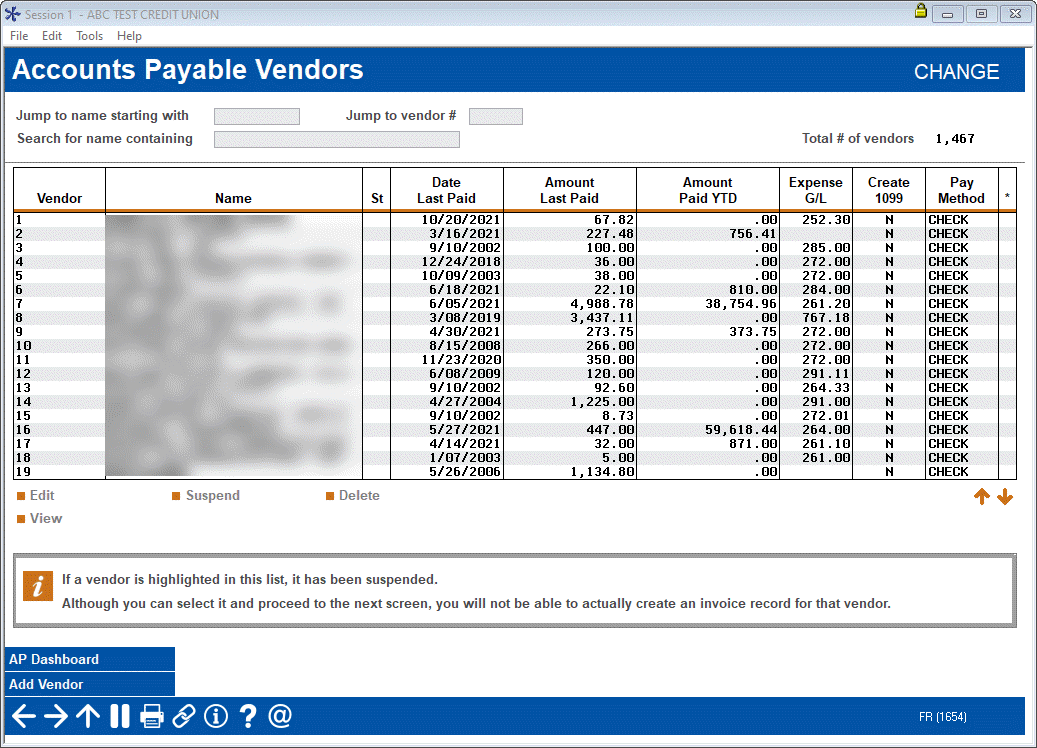
Screen Overview
This is the first of several screens used to set up or view Vendor records and review payment history information. Vendor records are used to identify a vendor name, address, and other information to be used when creating invoices, checks and payments via ACH. These vendors are also used when creating Subsidiary records (fixed assets, prepaids, accrued expenses, etc.).
It is easy to search for a specific vendor and sort the vendor list. The A/P vendors are presented in a convenient list with key information like Status, Date Last Paid, Amount Paid YTD and Expense G/L available for view.
-
To find a Vendor, use either "Jump to name starting with" to move to the name of the vendor in the list, or use the "Jump to vendor #" to move to the number of the vendor in the list, or finally, enter a name or part of a name in the "Search or name containing" field and use Enter.
-
To create a new vendor, use Add Vendor. The next available vendor number will be assigned automatically.
-
To modify an existing vendor, enter the vendor number, or select it from the list (arranged in order by vendor #) and use Edit or use Enter to proceed to the Edit version of the detail screen.
-
To view an existing member information, select a vendor from the list and use View-only version of the detail screen.
-
A vendor that appears highlighted in this list has been suspended. Select the vendor and Suspend to suspend it. To reactivate the vendor, select it and use Suspend again so that it can be used for any new activity (invoices, subsidiary records, etc.). Vendor information and paid invoice history will remain. There will be one confirmation message.
-
To delete a vendor record, select it from the list and use Delete. There will be one confirmation message. (Remember that vendors configured here may also be used by Subsidiaries and other programs on the core.
-
Use AP Dashboard to view the Accounts Payable Transactions dashboard.
Printing a "Quick G/L Check"
If this screen is accessed via "Quick Check" on the Process Payments for Vendors screen, selecting a vendor will take you to the Create Quick G/L Check screen where you can create a check for a vendor without an invoice. (If approvals for payments is activated, this feature will not be available.)
Additional Video Resources

|
Check out these additional video resources! |